

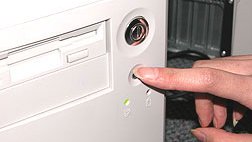
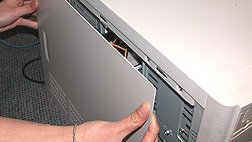
1. Open your computer.
Turn off your computer, unplug it, and remove the cover.
2. Locate the DIMM sockets in your computer
If there are no vacant DIMM sockets you will need to remove an existing DIMM. You can eject the DIMM by pressing down and outward on the retention clips.
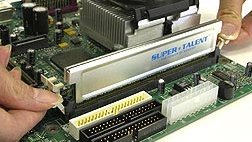
3. Plug in your DIMM modules
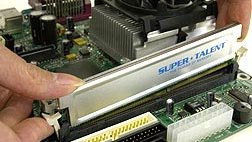
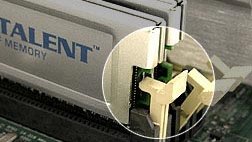
Remove your DIMM module from its package. Line up the row of gold pads on your DIMM with the DIMM socket, making sure the notches on the module align with the notches in the socket.
Here are some tips to help you determine which DIMM socket to use:
- Use the DIMM socket(s) with the lowest number printed on the motherboard (eg. DIMM0 first)
- If there are no numbers visible, use the DIMM socket(s) closest to the CPU first
- Use the DIMM socket adjacent to an occupied DIMM socket
- Or, consult your motherboard manual to determine which DIMM socket(s) to use.
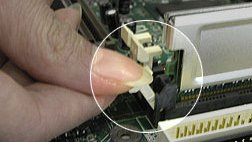
Firmly press the module into the socket with your thumbs. Make sure the retention clips snap into the notches in the ends of the module to hold it in place. When the module is properly seated the retention clips on each end of the socket should be clipped into the rounded retention notches.
4. Put the cover back on your computer
Screw the cover onto your computer, plug it back in, and enjoy your new memory!